Thursday, July 28, 2011

Goblin gets a temporary background!

I have decided to give my Goblin some sort of environment to live in, and also something to do. For the sky I used a render done in Terragen. The rocks and mountains were painted in Photoshop
I was imagining the Goblin set in a planet that looks somewhat like Mars. I thought this would do the trick.
I modeled the hand and the crystal in Maya. The energy effects on the crystal were done in Maya and post-processed in Photoshop.

For this particular render I used indirect lighting (HDR), combined with a regular light rig.

Rendered and Lit in Maya/Mental Ray


Goblin looking good in Mental Ray skin!!!

Finally imported the Goblin into Maya!
I used Mental Ray's, "misss_fast_skin shader", in order to get the subsurface scattering effect of real skin.
I created all the maps in ZBrush through the use of poly-paint, no texture sampling was used whatsoever. I am posting all of them except for the Displacement Map (there's no point in displaying a 32 bit map file in an 8 bit environment such as this one).

The bust was modeled in Maya
Sculpted, painted, and textured in ZBrush.
Lit and rendered in Maya/Mental Ray.
Composited in AfterEffects.


Reworking the facial structure of the Goblin

I hate it when this happens, but I didn't like how the Goblin turned out. There was something missing, and after looking at it for a while I realized that the eyes were not quite right. The nasal-labial folds needed more definition, as well as most of the wrinkles in the face and neck. It also needed more asymmetry.

The following images are the result of those changes.
All of the following images have been rendered in ZBrush, and composited in Photoshop.


Clay Renders of the Goblin


Wednesday, July 27, 2011

Goblin fully textured

I polypainted the goblin's skin in layers and steps. My original intent with this project was to also practice painting realistic skin textures. This Goblin will ultimately be rendered in Mental Ray, and I will be using Mental Ray's, misss_fast_skin shader to recreate the layered effect of real skin.
In ZBrush I painted the three different layers, Epidermal, Subdermal and Back scatter layers.
In conjunction all of these layers work very well to give a very nice and realistic look.
The following render was done in ZBrush.


Quick Sculpting Exercise: A Goblin

During the brainstorming days, when I was trying to come up with a project idea for the Modeling Studio class, I ended up with two characters that I wanted to model, the Shaolin, and a Goblin/Elf. I chose to do the Shaolin character for the class project, but I felt that I could squeeze in the Goblin character in my schedule as a side project. Due to time constrains I decided to model only the bust of the Goblin, and get a feel for what his face is going to look like. I will model the full Goblin once I have some free time.

This first render composite is of the Goblin right before I started sculpting the skin texture, or poly-painting the skin color textures.

Tuesday, July 26, 2011

Shaolin In Thailand test renders

These are some of the final test renders I did for my Modeling Studio class.
Pretty much everything is where it's supposed to be. The only thing left to do is refine the textures, and rework many other areas that I feel need more attention. The environment still needs more work also.

I am also including a turntable and a quick flyover animation of the environment. For now this is just a preview, I will be doing a better animation once I am completely done with the environment and all of the other changes.

All models were created in Maya; sculpted and textured in ZBrush; rendered in Mental Ray, and composited in After Effects.


Shaolin ready for battle!

The following are ZB renders of the Shaolin in action. These are not final as I am still working on refining the pose, but these are pretty close to what I am envisioning. I am also including some close-up shots of the hands and the feet. The Chinese writing on the sash says, Choi-Li-Fut, which is the Kung Fu style the Shaolin is practicing.

Sculpted, textured and rendered in ZBrush


Shaolin Face Refined

Following are some renderings of the face in it's final stages of texturing.


Monday, July 25, 2011

Shaolin anatomy refined.

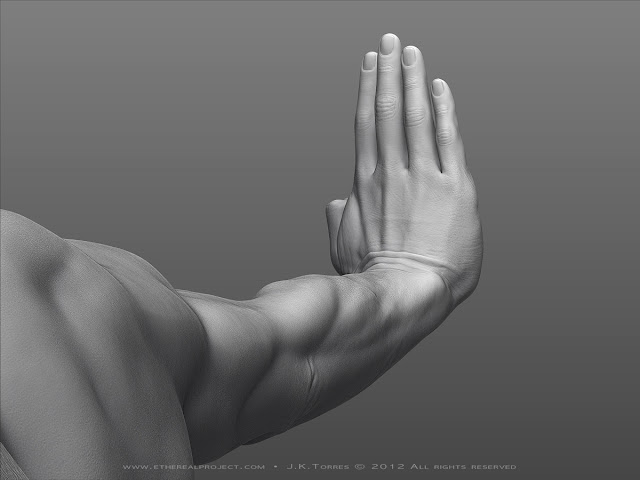
These are some ZBrush renderings showing the arms and hands with their textures sculpted on.

Hands and Arms


Character Anatomy

This render shows the last version of the character before detail and posing. It mostly shows the major forms and proportions. The shape of the face it's pretty close to it's final stage, but I am sure I will be tweaking much more.
I used some of Jet Li's pics as reference for the face.


Shaolin Anatomy 

The Buddhist Temple Ruins

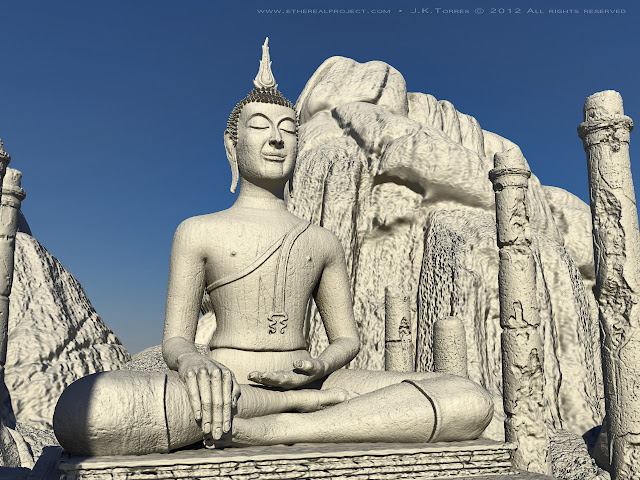
These are some renderings of the environment I created around the Buddha statue.
I wanted to recreate a very torn and aged temple, with broken pillars, eroded stones and ancient looking brick and mortar.


Sunday, July 24, 2011

Shaolin in Thailand

This is a project that lasted the whole semester. I did it for my Studio Modeling class.
We were instructed to divide the project into two steps. The first step was to build the environment and props, and the second was to build the character that was going to reside in the environment.

I decided to model a martial arts scene. The character will be a Shaolin. My idea is to have the Shaolin surrounded by the ruins of an ancient Buddhist temple.

I modeled the environment, props and character in Maya, then all the pieces were taken into ZBrush for further sculpting.


Thai Buddha Statue